
CREATIVE FAMILY FUN: Fabric blooms brighten back-to-school wardrobe
By Donna Erickson — August 19, 2021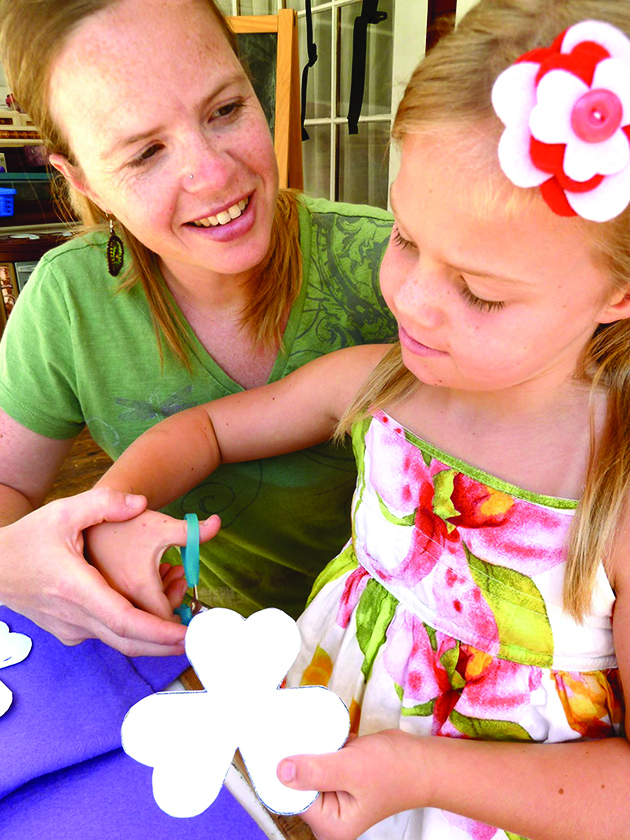
Robyn Anderson guides her daughter, Ocean, as she cuts out a pattern for back-to-school fabric hair clips. (Photo by Donna Erickson)
There’s flower power in kids’ and their moms’ imaginations. Just ask Robyn Anderson, busy mom of three active daughters.
“I love fabric and can’t get enough of prints, stripes and dots,” she said as she unveiled before me piles of trendy cotton yardage she has collected here and there. “If I see clothing and accessories in the store that look simple and cute, I say to myself, ‘Now I can make that!’
Her latest inspiration blossomed when she and her 6-year-old daughter, Ocean, noticed flower-shaped fabric hair clips and embellishments in fall’s back-to-school fashion. Layered petal-shaped fabric pinched together with buttons and an added clasp or pin on the back looked easy enough for them to make themselves, so they gave it a try. And yes, the blooms were a snap to make.
Get started creating adorable one-of-a-kind flower accessories too, using these simple steps. You’ll soon discover that like flowers in nature, each one is unique. Once you make a few, share the creativity with other moms and their daughters for a get-together of creative and fashionable fun.
Here’s what you’ll need for one flower hair clip or clothing accessory:
- Paper, pencil and scissors
- Four 5-inch-by-5-inch pieces of cotton fabric or felt pieces in contrasting colors
- Fabric glue
- Button
- Hair clasp or brooch pin, available in craft stores
- Needle and thread
- Make patterns. First, draw a 3-1/2-inch-wide shape on paper that resembles a three-leaf clover without the stem. (Pick clover from your yard for inspiration, or look for a perfect clover shape in a book or online. Notice that each leaf is heart-shaped as you begin drawing.) Draw two more shapes that are 2 1/2 inches and 2 inches in width.
- Set patterns on fabric, outline with a pencil and cut out. You’ll want two 3-1/2-inch shapes.
- Stack and arrange cut-out shapes from the two largest 3-1/2-inch shapes to the smallest to resemble a flower, gluing each layer in place at the center point. Let glue dry, then pinch the center a bit and sew a button on top through all slightly pinched layers.
- Sew hair clasp or glue brooch pin to the center of the back of the base.
TIP: Creating and crafting with school-age kids provides ideal opportunities for teaching and practicing new skills such as using sharp scissors or threading a needle.
***
Find more family fun at www.donnaerickson.com. Write to Donna at Info@donnaerickson.com
© 2021 Donna Erickson
Distributed by King Features Syndicate
Trending News
 Two killed in Eden Expressway ...Two people were killed in accidents on the Edens Expressway. A three-unit ...
 Randall Road detour in effect ...Motorists traversing Randall Road through the Miller Road intersection in Carpentersville have ...
 Bloomington man killed in truck ...A Bloomington man died from injuries sustained Wednesday morning when his truck ...
 Foster, Casten say cuts to ...Two suburban U.S. representatives say a new law containing severe cuts to ...